Smart Objects in PSD mockups: the most common errors & quick fixes


If you’ve ever opened a PSD mockup and seen a layer called “Your Design Here”, you’ve already used Smart Objects even if you didn’t know the name. Smart Objects are one of those Photoshop features that feel invisible when everything works… and very loud the moment something breaks. This guide gives you a fast, practical way to understand how Smart Objects behave in mockups and how to fix the issues you’ll run into most often in Photoshop (with notes for Photopea too). You’ll also see Creatsy-specific tips where they matter.
Quick fixes first: if your mockup “isn’t working”, try this
Before you read anything else, run this mini-checklist. It solves most issues in under a minute:
Did you open the PSD (not the JPG preview)?
Did you open the correct Smart Object? (Some mockups have several.)
Inside the Smart Object, is your artwork above the placeholder/sample layer?
Did you press Save in the Smart Object tab (PSB) -not Save As?
If it updated but looks “off”: are effects/shadows/adjustments changing the colors or contrast in the main PSD?
No Photoshop? You can often edit PSD mockups in Photopea (browser-based) using a very similar workflow: double-click the Smart Object thumbnail to open its contents, replace your artwork, then use File ? Save to update the mockup.
If you only remember one rule from this article: Smart Object edits don’t apply until you save the Smart Object contents.
Smart Objects in 60 seconds
A Smart Object is a layer that keeps your original content safely “sealed” inside a container. Instead of permanently changing pixels on that layer, you edit the source that lives inside it and Photoshop updates the Smart Object wherever it’s used. That source can be almost anything: a photo, a vector element, an illustration, a group of layers, or even a full repeat pattern layout.
This is why Smart Objects feel so powerful in real design work. You can resize, rotate, and warp your artwork as much as you need without degrading it the way regular pixel layers do. If the same artwork appears in multiple places (for example across a multi-angle mockup or several layout versions), you can update it once and have every instance refresh automatically. And because effects can remain editable, you keep flexibility: adjustments and styling don’t have to become “baked in” and irreversible too early in the process.
For pattern designers and digital artists, Smart Objects are a practical way to keep a clean “master” motif, label, texture, or layout that you can push through mockups, colorways, and variations without rebuilding everything from scratch.
How Smart Objects actually work in mockups
A helpful way to picture a Smart Object in a mockup is to think of it as a window. In the main PSD you’re looking at the “scene”: all the realism layers are already built in - lighting, wrinkles, perspective, shadows, masks, and color adjustments. Your design sits inside that setup, but it’s being displayed through the Smart Object layer.
When you double-click the Smart Object, you’re not editing the mockup scene itself. You’re stepping “behind the window” into the source document that feeds the mockup. That’s where you replace the placeholder artwork with your own design. Once you save that Smart Object source, Photoshop (or Photopea) pushes the update back into the main PSD, and the mockup refreshes with the same realistic effects applied.
That’s why Smart Objects are basically the engine of PSD mockups: the mockup keeps all the realism, and you only swap what’s inside.
Linked vs Embedded Smart Objects
Photoshop Smart Objects come in two forms. Embedded Smart Objects keep the source stored inside the PSD, which makes the file easy to share, but can increase its size. Linked Smart Objects point to an external file on your disk, which helps keep PSDs lighter but if that external file gets moved or renamed, Photoshop will mark the link as missing and you’ll need to relink it.
Creatsy mockups: how the files are usually organized
This isn’t a second “set of fixes”, it’s just a quick orientation so you don’t get lost.
Many downloads include both a JPG preview (flat image) and the PSD (editable, layered). If you see no layers, you’re almost always in the preview.

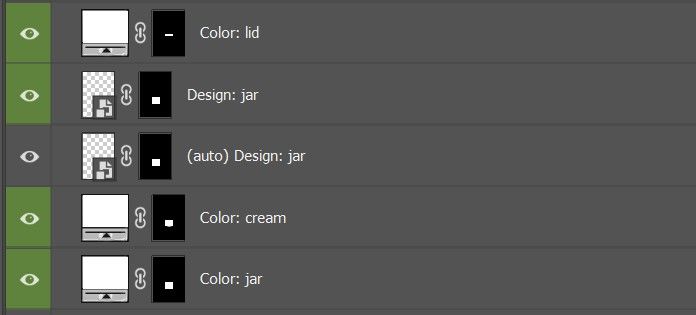
Creatsy mockups typically name Smart Objects after the exact part they affect (for example: Front, Back, Label, Sleeve, Insert, Hangtag, etc.). That makes it easier to pick the right editable area quickly.
The realistic look (shadows, highlights, textures, color grading) usually lives in separate effects/shadow groups in the main PSD, so if your design looks darker or “muddy”, the fix often isn’t inside the Smart Object at all.
Layer names and structure can vary slightly by pack, but the workflow is very consistent.
The most common Smart Object errors in PSD mockups (and fast fixes)
1) “I only see one flat image. There are no layers.”
Most likely: you opened the JPG preview instead of the PSD.
What to do:
Go back to the folder and open the PSD file (not the JPG).
If there’s a PDF/manual included, it can help you locate the editable areas fast.
Creatsy note: Creatsy downloads commonly include a preview image alongside the layered PSD, so this is one of the most common “false alarms”.
2) “Nothing changes in the mockup” (the classic)
What’s usually happening:
You edited the Smart Object, but didn’t save
You saved a copy instead of saving the actual Smart Object tab
You edited the wrong Smart Object (common in complex mockups)
Your design is hidden under the placeholder layer inside the Smart Object
A quick fix that works in most files:
Go back into the Smart Object tab (PSB)
Turn off the placeholder/sample layer to confirm your design is visible
Press Save (Ctrl/Cmd + S)
Return to the main PSD
If you want a foolproof test: make a tiny visible change (like a bright dot in the corner), save, and check whether the mockup updates.
Photopea note: Make sure you’re saving the Smart Object document (the tab that opens after you double-click the thumbnail), not just exporting the main PSD. Use File -> Save (Ctrl/Cmd+S) inside the Smart Object, then switch back to the main file.
Creatsy note: Creatsy Smart Objects are usually named by part. If nothing updates, you may be editing the wrong part (e.g., Label vs Box Front). The name is your shortcut.
3) “My design is there, but the sample artwork is still showing”
This is almost always layer order inside the Smart Object.
What to check inside the Smart Object:
Your artwork layer should be above the sample/placeholder layer
Hide or delete the placeholder
Save, then return to the mockup
This happens a lot when you drag & drop quickly and don’t look at the layer stack.
Creatsy note: The placeholder is often clearly named (sample/design/placeholder), so you can usually spot it instantly.
4) “Photoshop says: This Smart Object must be rasterized before proceeding”
What it means: you’re trying to use a pixel-editing tool directly on a Smart Object layer (Brush, Eraser, Clone Stamp, Healing, etc.).
Clean fixes (without breaking the mockup):
Edit inside the Smart Object, then save
Retouch on a new blank layer above the Smart Object
If you need the retouch to affect only that object, clip the blank layer to it
Rasterizing is okay only when:
You’re finishing the file and don’t need edits to stay flexible
You understand it’s a one-way move (you lose Smart Object benefits)
Photopea note: Just like in Photoshop, you can’t paint/clone directly on a Smart Object layer. Edit the Smart Object contents, or retouch on a new blank layer above it. Rasterize only if you’re okay with losing the Smart Object link.
Creatsy note: Rasterizing early often breaks the “swap design fast” workflow that mockups are built for. If possible, keep Smart Objects intact.
5) “Everything updates everywhere. I only wanted to change one item.”
That’s not a bug. Multiple layers are sharing the same Smart Object source (common in multi-angle or multi-item mockups).
Fix:
Right-click the layer -> New Smart Object Via Copy. Now it has its own separate source, so edits won’t affect the other instances.
Photopea note: Duplicating a Smart Object creates another instance linked to the same source, so editing one updates all of them. To make an independent version, right-click the layer and choose New Smart Object via Copy.
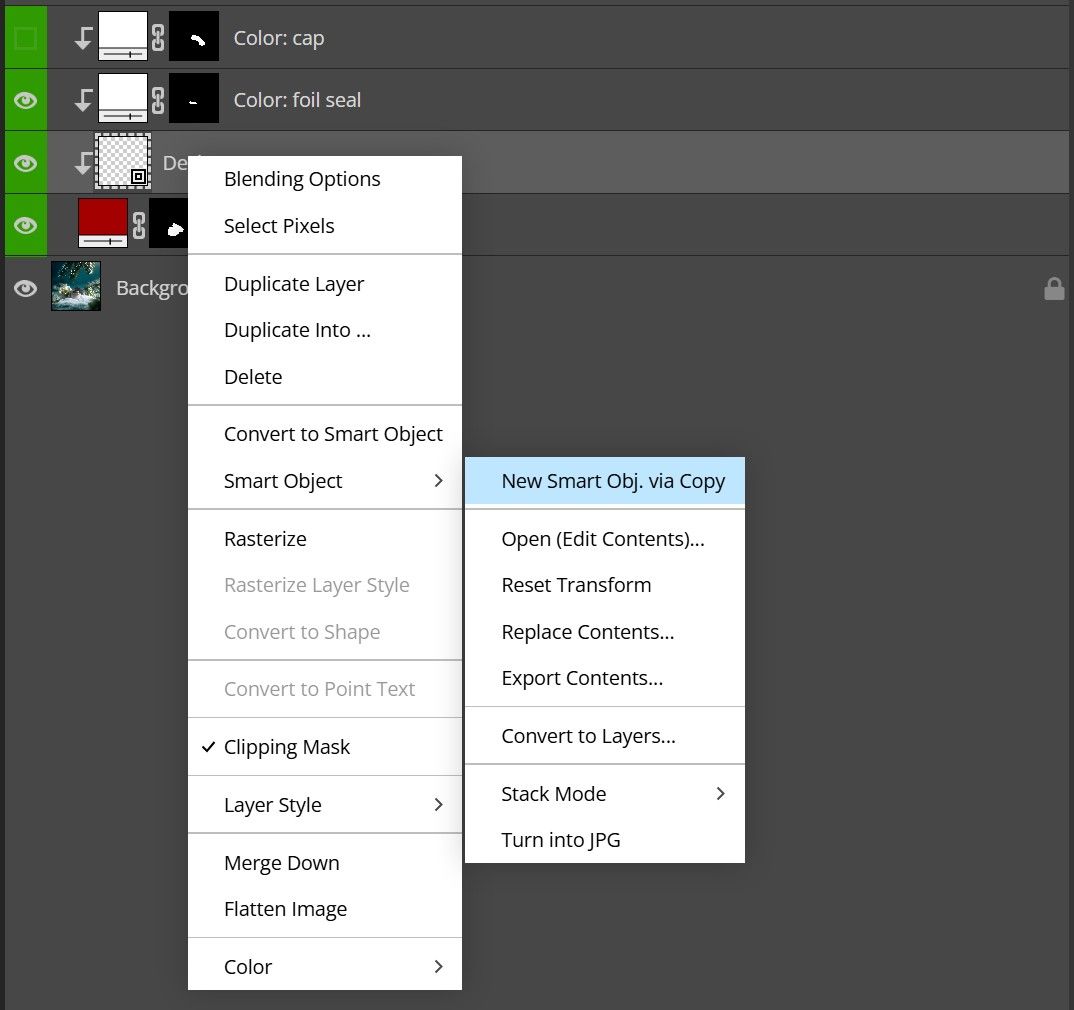
Creatsy note: If it’s a Linked Smart Object (with the chain icon), “New Smart Object via Copy" may be unavailable/greyed out. In that case, duplicate the source file and relink the Smart Object to the new copy.
6) “I duplicated it, but now my copies don’t update together”
This happens when your duplicates aren’t sharing the same source or when you accidentally created independent Smart Objects.
What to do:
If you want connected copies, duplicate the Smart Object layer normally (e.g., Ctrl/Cmd + J) so instances stay tied to the same source.
If you already have independent ones, decide what you want:
Same artwork everywhere -> rebuild duplicates from one “master” Smart Object instance
Different artwork per item -> keep them independent (or use New Smart Object Via Copy per item)
Mockups with multiple artboards make this easier to mess up than you’d think.
7) “Linked Smart Object missing” (question mark / warning)
What’s happening: the linked source file was moved, renamed, or deleted.
Fix:
Use Relink to point Photoshop to the correct file location
Prevention:
Keep linked assets in a stable folder structure
If you’re sending a PSD to someone else, consider embedding links first
Photopea note: Some templates use Photoshop Linked Smart Objects (File -> Place Linked), which rely on external files. Photopea doesn’t provide the same external linking/relinking workflow, so linked assets may not be fully editable there. Open the file in Photoshop and embed/convert linked objects first if needed.
8) “My design is cropped, stretched, or misaligned”
Inside the Smart Object, there’s a specific canvas size. If your artwork has a different aspect ratio, it may crop — or you may stretch it to fit and distort it.
What to do inside the Smart Object:
Use Free Transform and scale proportionally
Aim to cover the canvas without extreme upscaling (low-res files will soften)
Keep key details away from edges if the mockup has folds, seams, curves, or wraps
Pattern designer tip: if you’re placing a repeat, a Pattern Fill inside the Smart Object can make scaling/repositioning cleaner than manually transforming a bitmap.
9) “My design looks blurry or pixelated on the product”
Smart Objects preserve quality through transforms, but they can’t invent detail. If the Smart Object canvas is large and your artwork is small, it will look soft.
Fix:
Check the pixel dimensions of the Smart Object canvas
Place higher-resolution artwork (or vector)
Avoid scaling up small images dramatically inside the Smart Object
Rule of thumb: your artwork should match or exceed the Smart Object canvas resolution, especially for packaging, fabric, print, and close-up shots.
10) “My colors look different than my original”
Many mockups include realism layers: shadows, highlights, color grading, texture overlays, contrast boosts. They make the product look real but they can also shift saturation and brightness.
Fix (in the main PSD):
Toggle effect/adjustment groups on/off to find what’s influencing color
Reduce opacity of the strongest layers
If the mockup has product color controls (Color Fill layers), make sure you didn’t accidentally change them
Creatsy note: If the colors still look off after disabling the mockup effects, check the document’s color profile and Photoshop’s Color Settings (and make sure Proof Colors isn’t affecting the preview).
11) “The shadows are too strong for my design”
Shadows are great for realism, but they can crush detail, especially on dark patterns or dense artwork.
Fix (in the main PSD):
Find shadow/highlight groups and lower opacity
Turn off “extra” shadow layers until the design reads cleanly
Small reductions often keep realism while making the design feel more premium and legible.
12) “I can’t find the right Design Smart Object / there are several”
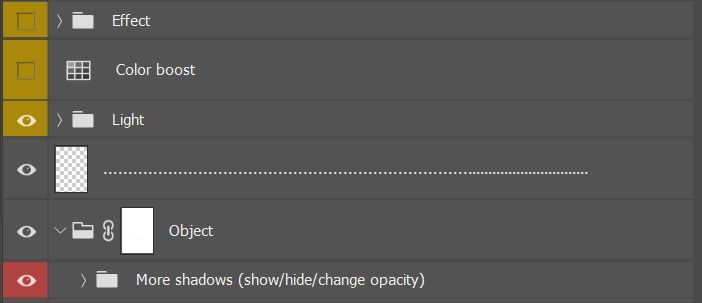
Mockups can be deep: groups inside groups, hidden variations, multiple angles, multiple printable areas.
A fast way to locate the correct editable area:
Expand top-level groups in the Layers panel
Toggle group visibility (eye icon) to see what changes
Use the Layers search to look for keywords like Design, Label, Front, Back
Once you find the likely Smart Object, toggle it to confirm it affects the part you want
Creatsy note: Creatsy usually makes this easier by naming each Smart Object after the part it affects (Label / Front / Back / etc.). In most cases, you don’t need to guess - the name tells you what to open.
13) “I can’t transform only part of a Smart Object”
Smart Object transforms apply to the entire layer.
If you need a partial transform:
Open the Smart Object contents
Adjust the specific element inside the source
Save and return
If you need partial edits constantly, consider splitting elements into separate Smart Objects instead of one combined container.
14) “I’m trying to edit this on Photoshop for iPad and it won’t work”
Photoshop on iPad currently doesn’t support opening/editing a Smart Object’s contents (the PSB you’d normally access via “Edit Contents”), so most PSD mockups require the desktop app for Smart Object edits.
Fix:
Use desktop Photoshop for full mockup editing
If you need a browser alternative, Photopea can handle many Smart Object mockups, but feature support can vary by file
15) “My PSD got huge and Photoshop is slow”
Smart Objects can bloat file size, especially when they’re embedded and high-resolution (and especially if you nest Smart Objects inside Smart Objects).
Ways to keep things lighter:
Use linked Smart Objects for large assets reused across many files
Avoid unnecessary nesting
Flatten only when exporting final deliverables (not while you’re still iterating)
A simple troubleshooting checklist
Save this section for later, it solves most mockup issues fast.
When a mockup feels stuck, run this:
Opened the PSD, not a JPG preview
Opened the correct Smart Object
Inside the Smart Object, your artwork is above the placeholder
Pressed Save in the Smart Object tab (not Save As)
If it updated but looks wrong: adjust effects/shadows/adjustments in the main PSD
Once you learn to spot these patterns, Smart Objects stop being mysterious and become what they’re meant to be: the fastest way to get realistic mockup results without rebuilding the scene every time.