Step By Step Guide
Step #1: Choosing the right mockup template
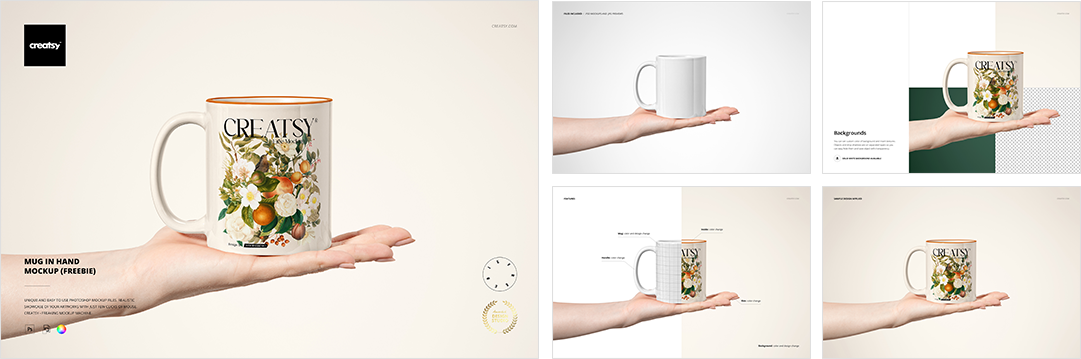
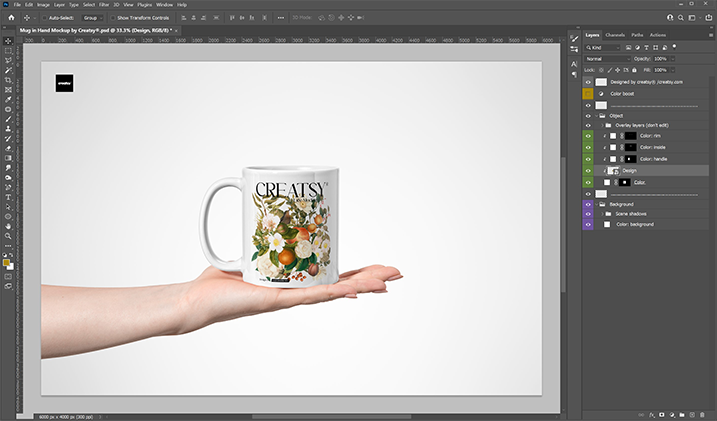
Before choosing a mockup please make sure you are using right version of your software (check our Software Requirements). For a example, let’s use our free Mug in Hand Mockup. Here is how the product looks like:
Step #2: Extract the files
When you download a PSD mockup, it is typically saved as a zipped file. Once you extract its contents, take a close look at what’s included:
- .psd file of the mockup, which is the source file you will edit
- .jpg file of the mockup, preview of a blank template without any design applied
- .pdf User Manual that explains how the mockup works
Step #3: Open the .psd file and study its layers
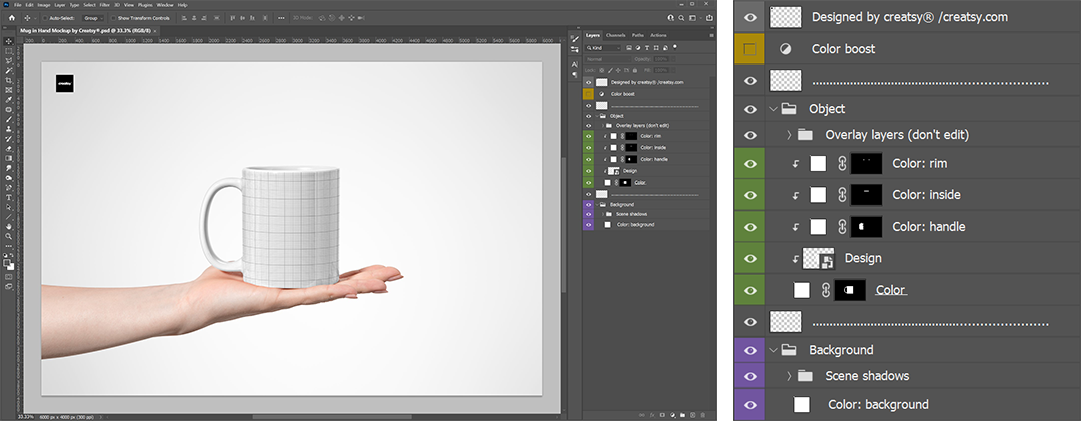
What you will find depends on how complex and detailed a mockup is. Understanding how the layers work on the template you’re using is important because you are eventually going to replace its default elements with your custom content. Our mug mockup file, for example, consists of these layer types:
- Creatsy logo - you can hide it or remove it.
- Special effect layer (e.g. color boost) - special effect layers are always highlighted with yellow and are applying changes to the whole scene, you can find here layers that control brightness, saturation, light, or light shadows.
- Color fill layers of main object (always named: Color: “...” and highlighted with green color) - with these layers you can change colors of mockuped objects
- Smart object layer (always named: Design: “...” and highlighted with green color) - smart objects are special layers that preserve an image’s source content and allow to perform a nondestructive editing of a layer.
- Background layers (highlighted with violet color) - in Background folder you will find specially prepared folder with scene shadows layers (they can be switched off if nessesary) and color fill layer to set a custom background color, in the angled views you will also find here a smart object layer that will distort your background textures according to the perspective.
- Dotted lines - dividers that keep the layers in order.
If you are facing any difficulty while locating a particular layer, you can click on the eye icon to toggle visibility.
Step #4: Place your design via Smart Object
To do so, just click the Smart Object icon of the “Design” layer. This will open a new Photoshop window (.psb file) displaying the artwork that you are going to replace. In this case the Smart Object opened like this:
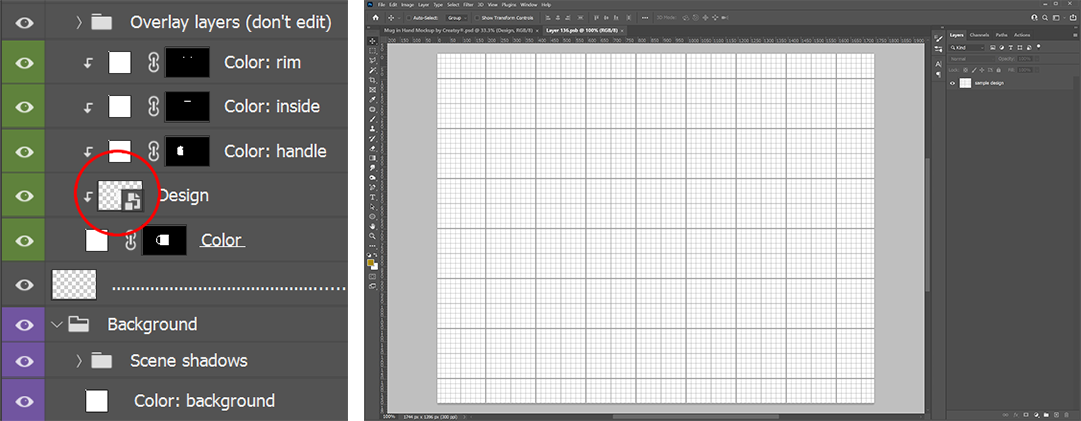
You can see that the default mockup content is graph paper layer. All you have to do is to replace it with your custom design like we did with the amazing “Victorian Classic Christmas” composition from Nadi Spasibenko. Just have your desired artwork ready and drag it into the Smart Object window (.psb file) you just opened. Hide or remove “sample design” graph paper layer. Click CTRL+S (Command+S) to save and then CTRL+W (Command+W) to close once you’re done.
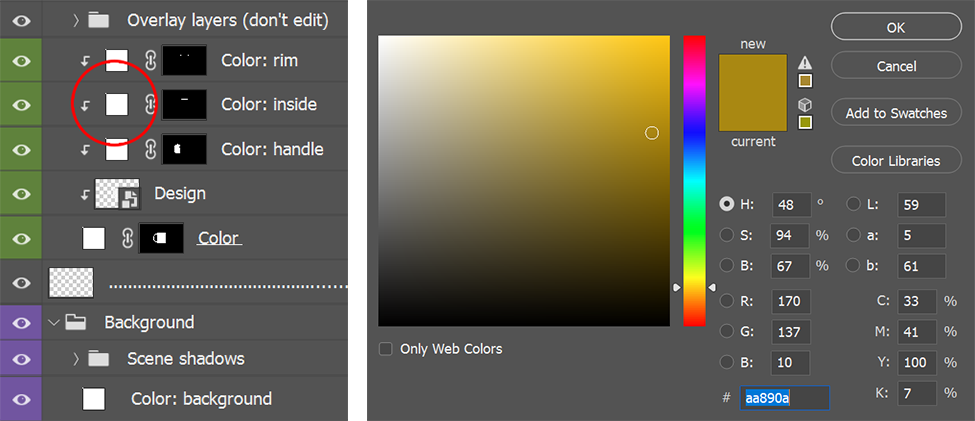
Step #5: Set colors
Now it’s time to choose colors of object and background. To edit Color Fill layers double click on the small color square. Pick a color from the Color Picker that appears. You can move the round selector to adjust the color, and then click OK. Tip: Drag the vertical slider on the rainbow-colored bar to view a different color range.
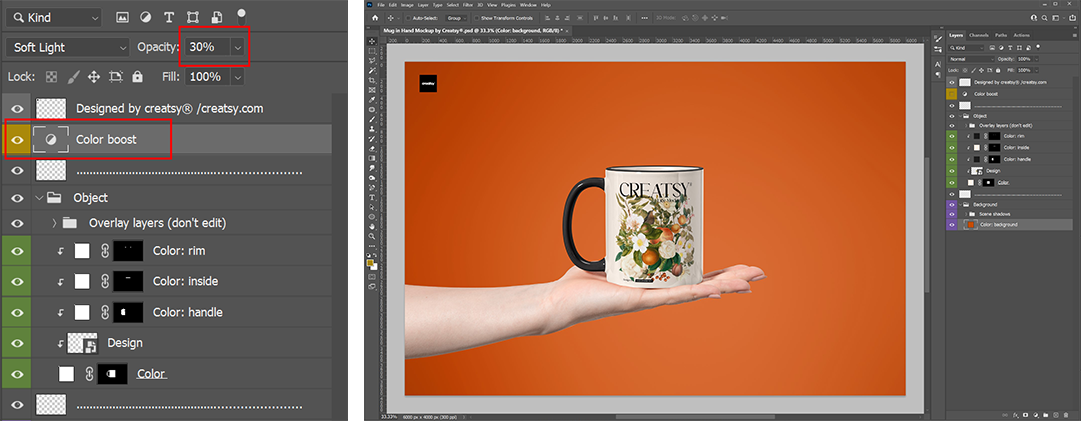
Step #6: Adjust special effects
Select a special effect layer (or folder), toggle it if it’s hidden, then change it’s opacity following to your needs. Now go back to the original PSD file and you’ll find the new changes in place. The same mockup template looks like this