How To Use a Mockup Template (Step by Step)


As the trend of e-commerce and digital branding continues to rise, it is vital for graphic designers to possess a distinct, realistic set of mockups. When presenting designs to a customer, a realistic mockup template can enable you to outshine the rivalry. In short, the correct mockup can enable the customer to gain a better comprehension of how the final product will appear.
Step #1: Choose the right mockup.
In this article, you will learn how to use standalone PSD files with Smart Objects. Smart Objects store an image's source data and typically contain vector and raster image data. They are very useful when dealing with mockup templates as they separate the initial artwork you are attempting to insert into the scene from the other visual effects.
There are numerous PSD mockup files in our shop and freebie section that you can choose from. Creatsy offers a whole section dedicated to paid mockups, so be sure to take a peek if you need something special and ready to go. To get you started, it's essential to understand a mockup template's folder structure. All our mockups arrive as a zipped file, so after you unzip it, take a moment to check out what's provided. These usually include the following documents:
- layered, editable PSD files, the source files that can be edited,
- blank JPG files - previews of the template,
- PDF User Manual that explains how the mockup works.

In this tutorial we were working with Tote Bag Mockup Set 2 template and these artworks, but you can also use some of our free tote bag mockups listed at the bottom of this article.


Step #2: Unzip and open the PSD file.
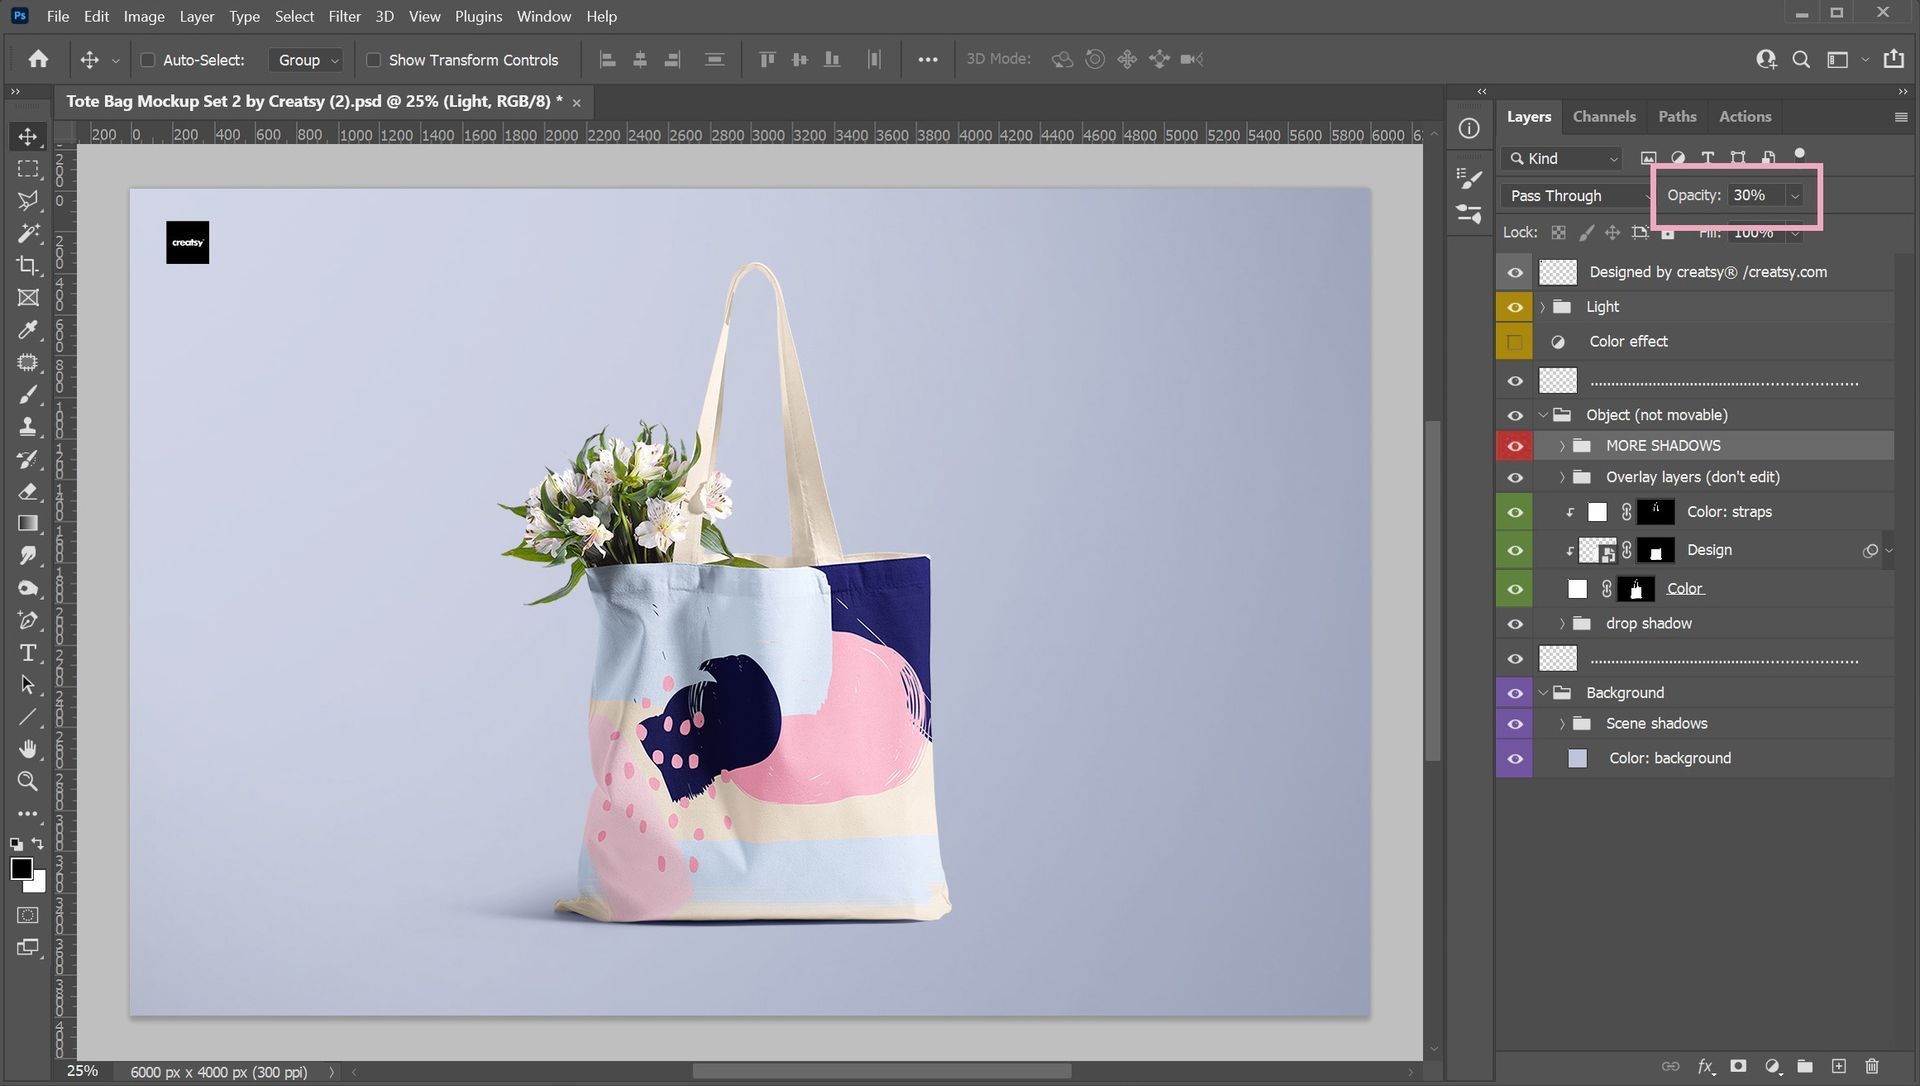
Open the .psd file in Adobe Photoshop and have a look on the layer palette:
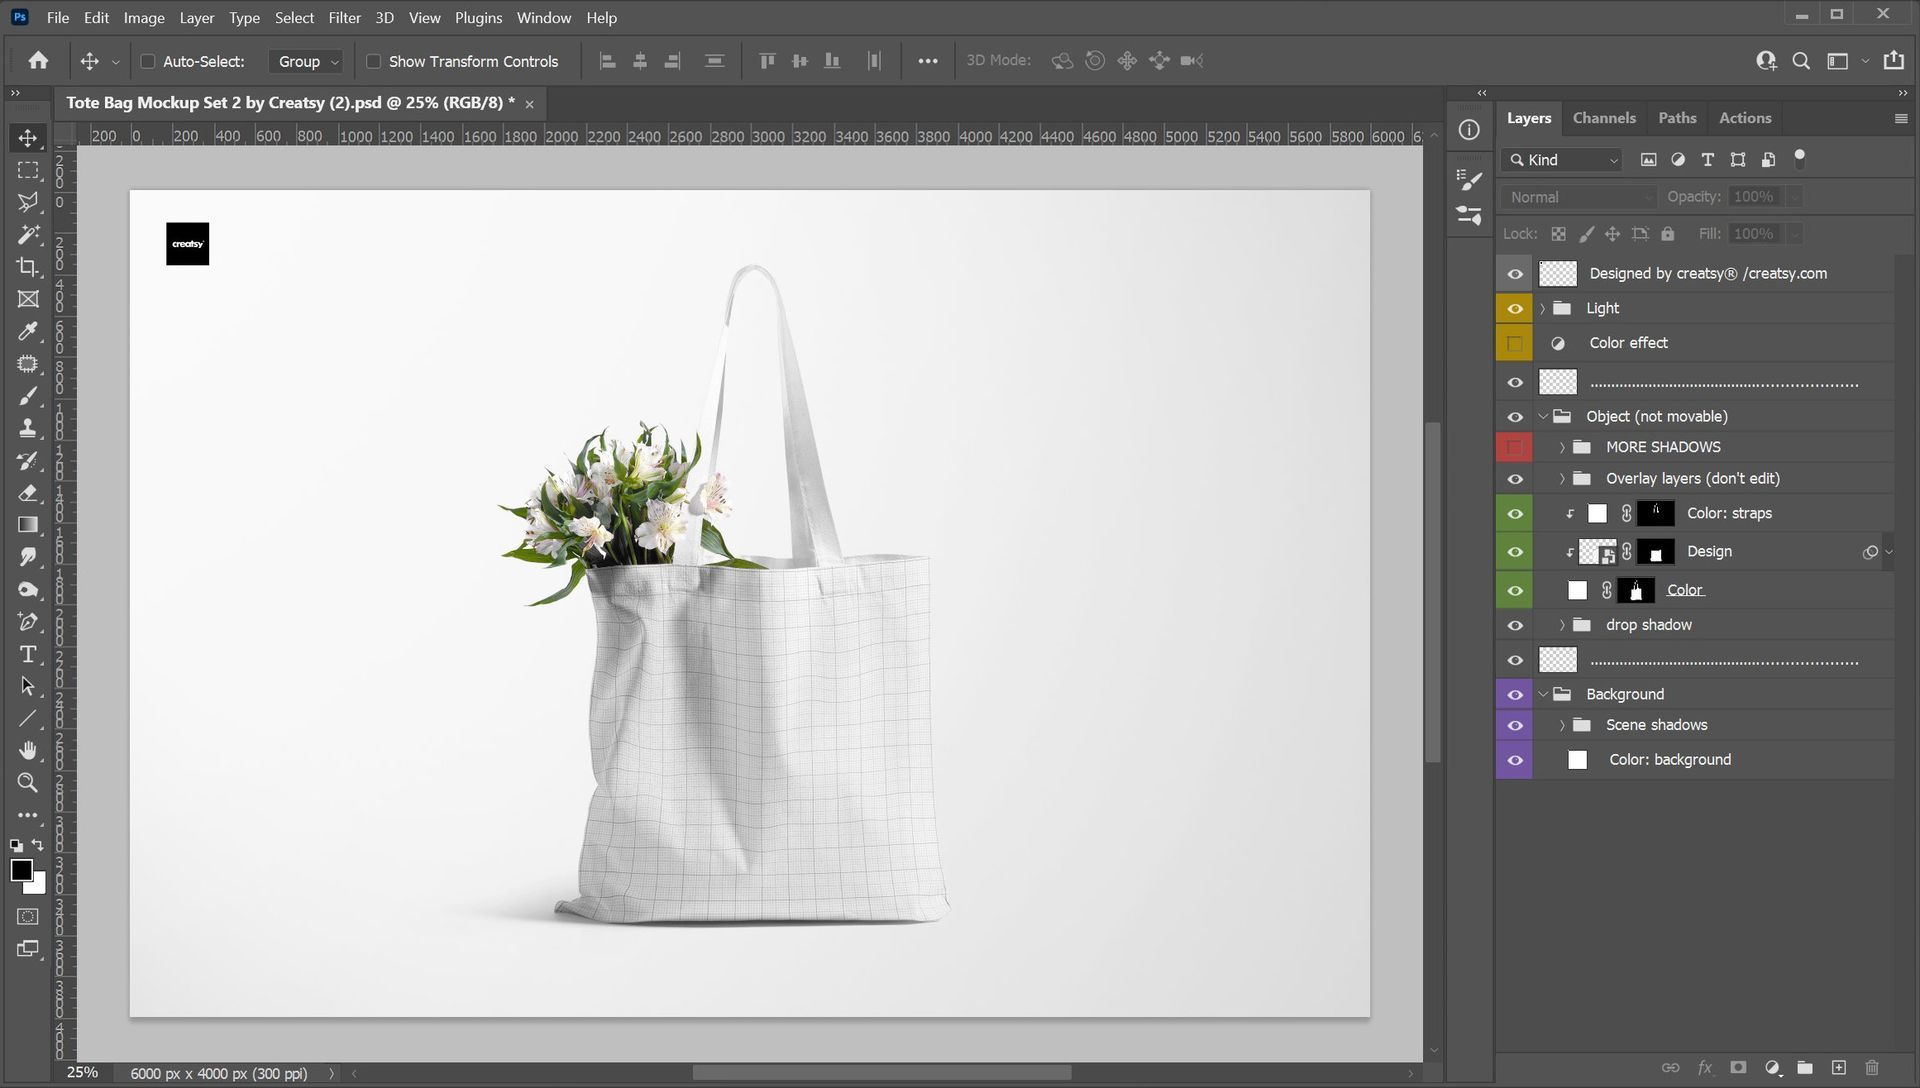
To make it easier to customize and replace default elements with your own content, it's essential to understand the different layers and how they work. In this mockup, you'll find these types of layers:
- Color-changing layers (to change the color of the bag and background).
- Smart object "Design" layer (to apply the design to the bag).
- Adjustment layers (color effects filter, which is applied to the entire scene).
- MORE SHADOWS group. Show it and play with it's opacity to add an more realism to the image. Works great with dark and dense patterns.
- In addition, there are layer groups for object shadows (drop shadow), background shadows (Scene shadows) and scene lighting setup (Light) - all of which can be hidden if necessary.
If you're having trouble finding a certain layer, simply click the eye icon to switch its visibility.
Step #3: Edit the PSD file.
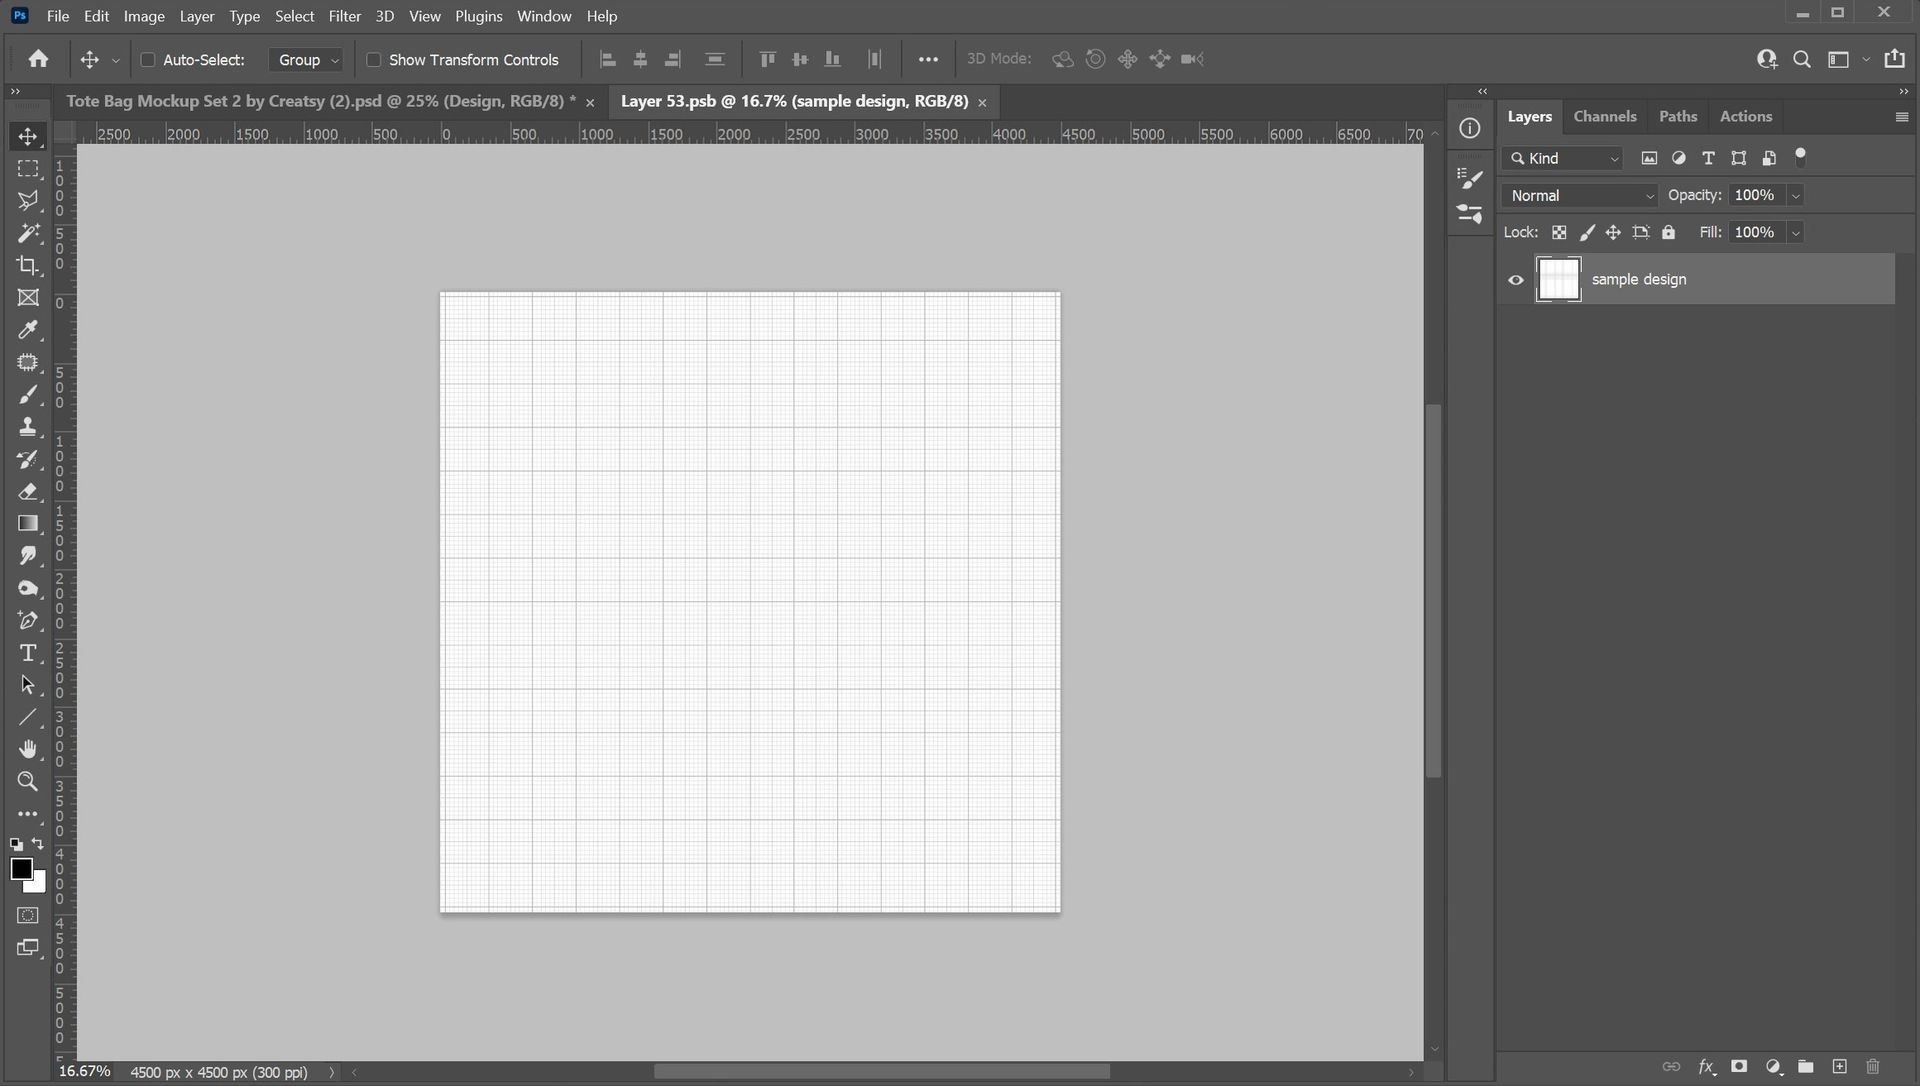
Add you design via smart object
Look for the Smart Object ("Design" layer) and open it by double-clicking the thumbnail. By doing this, a new Photoshop window will be opened, and it will only show the artwork that needs to be replaced ("sample design" layer):
Let's replace it with a Color Art Patterns by Funderful. Open the artwork in Photoshop and simply drag and drop it to the new opened window (.psb file), then transform it to fit the canvas.
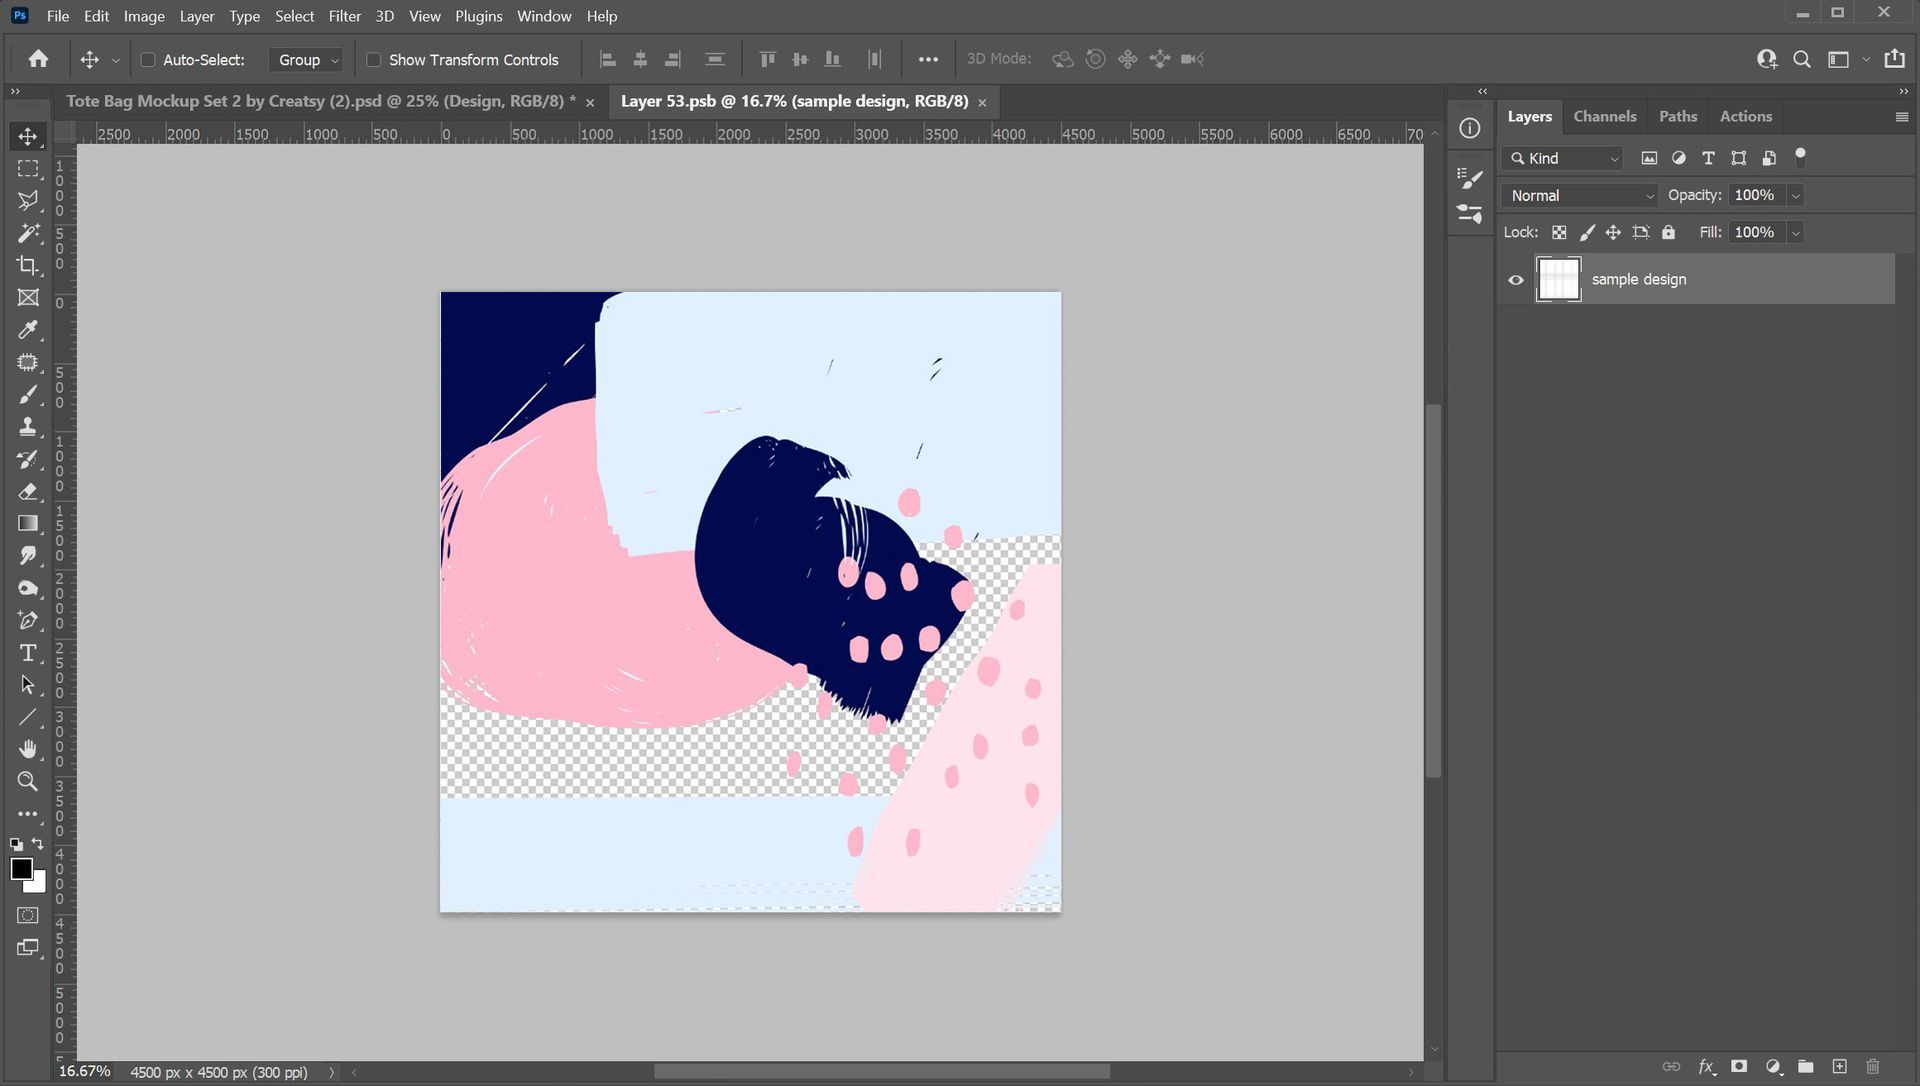
After editing save (CTRL+S, Command+S) and close (CTRL+W, Command+W) the .psb file.
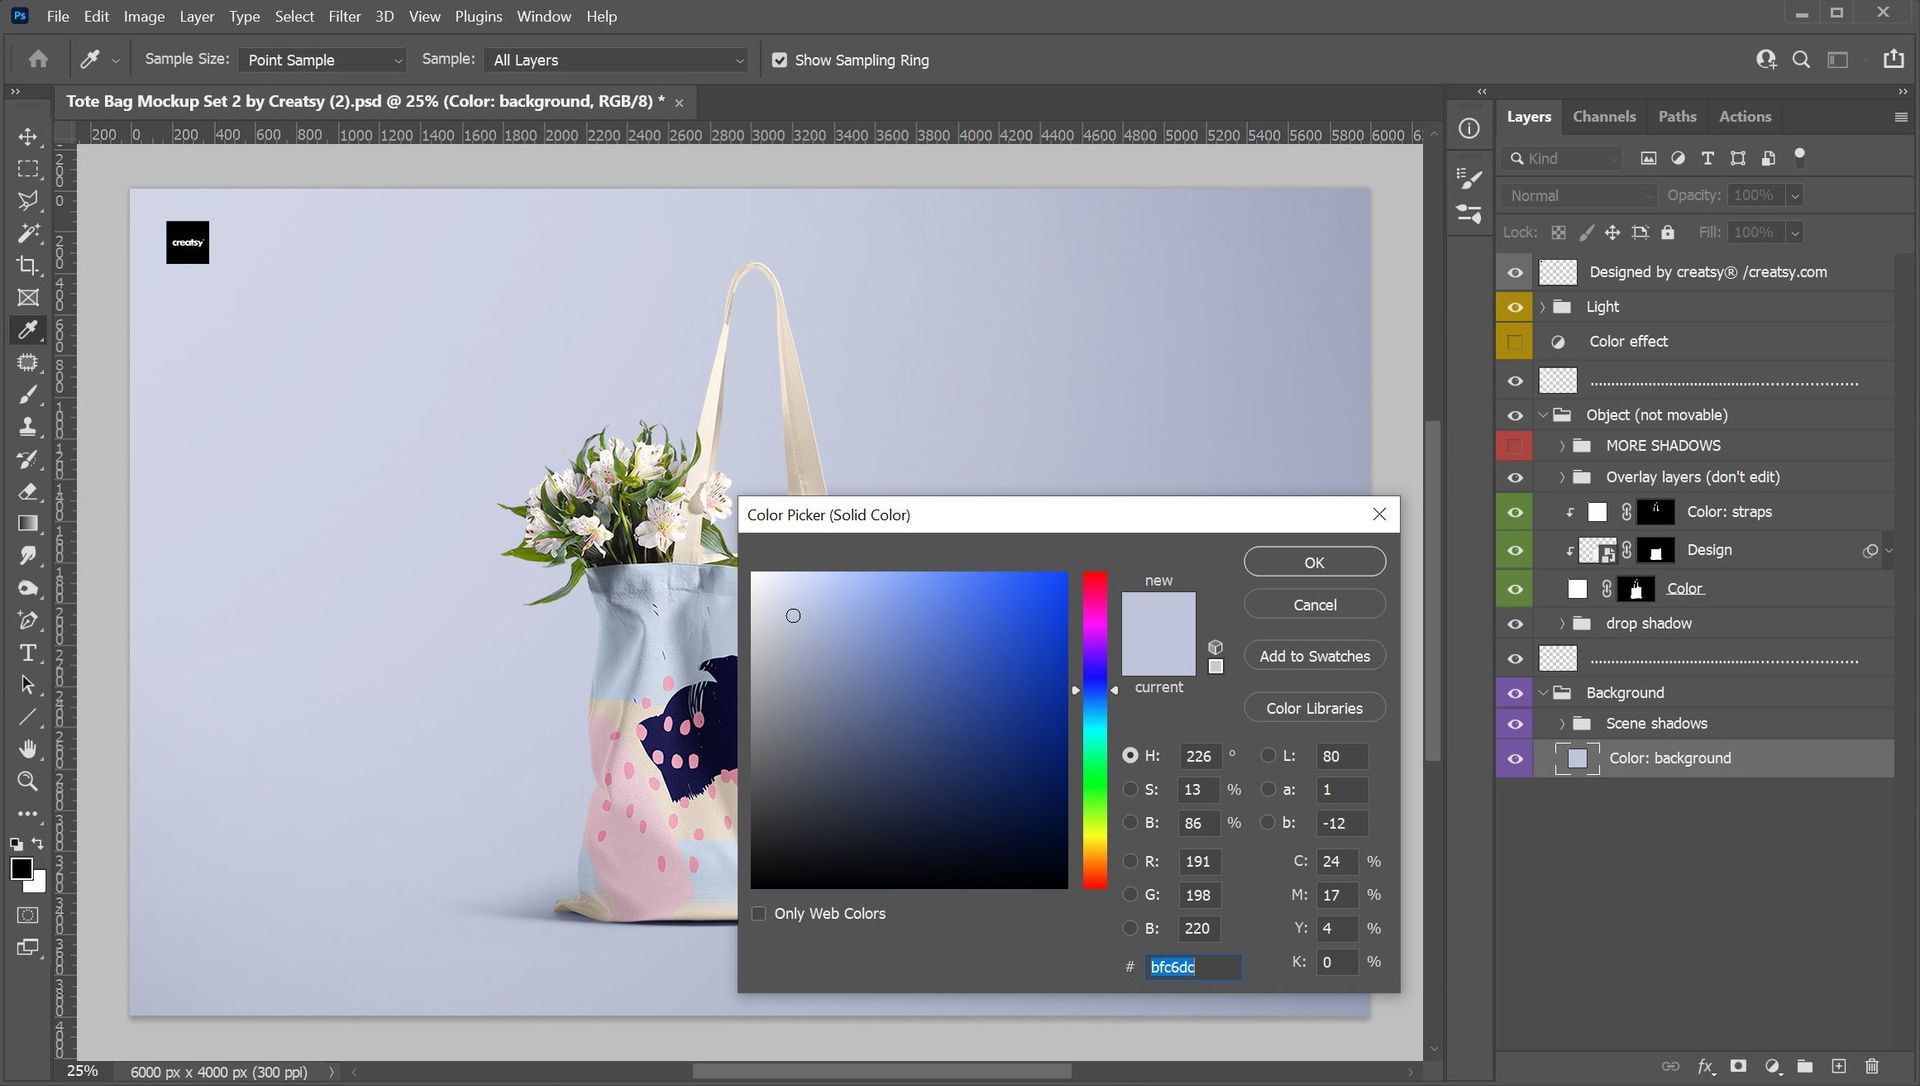
Adjust colors of object and background
Doubleclick one of the color layers and pick the color you prefer. In this mockup file you can change color of bag, straps and background.
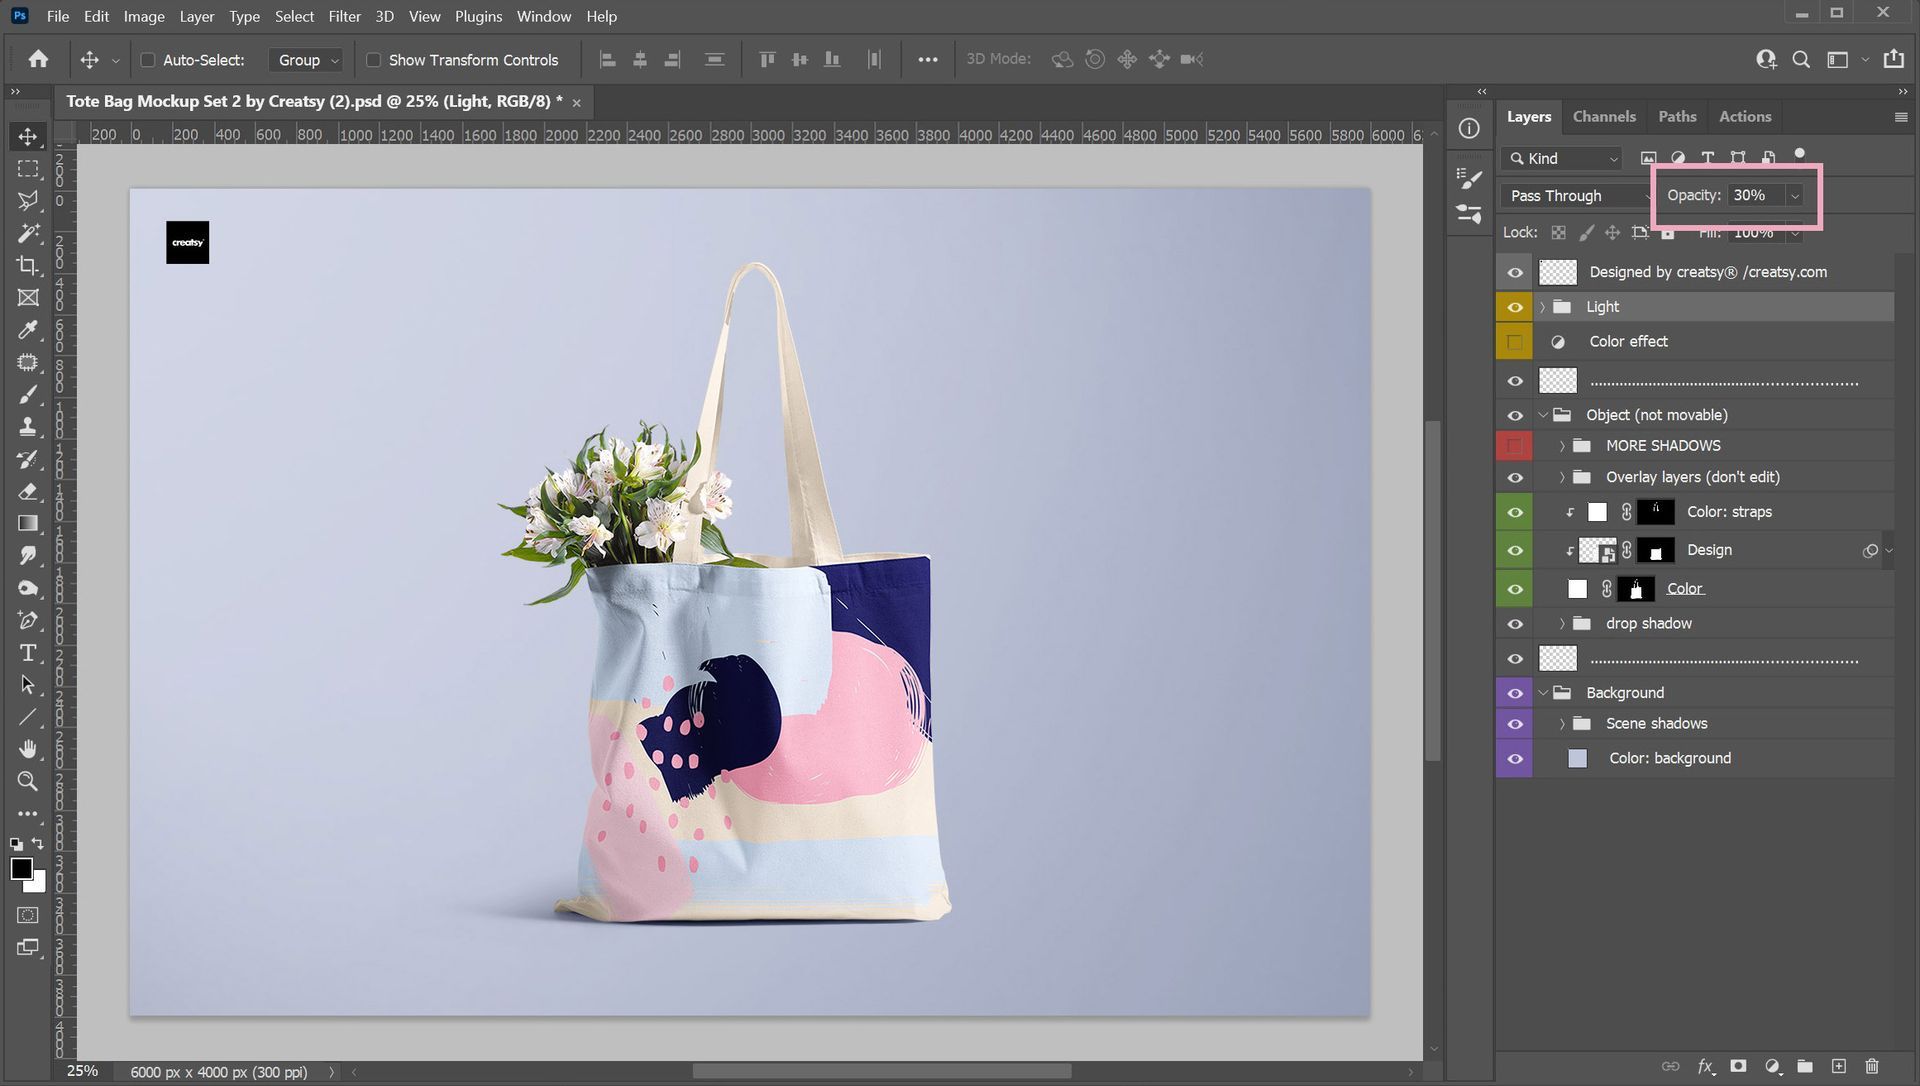
Play with "More Shadows"
Go to the "MORE SHADOWS" group and adjust its opacity. This is a great tool when working with darker or more intricate designs.
Light setup
Choose the "Light" group and adjust the opacity. It's a good idea to make the setting higher in darker scenes.
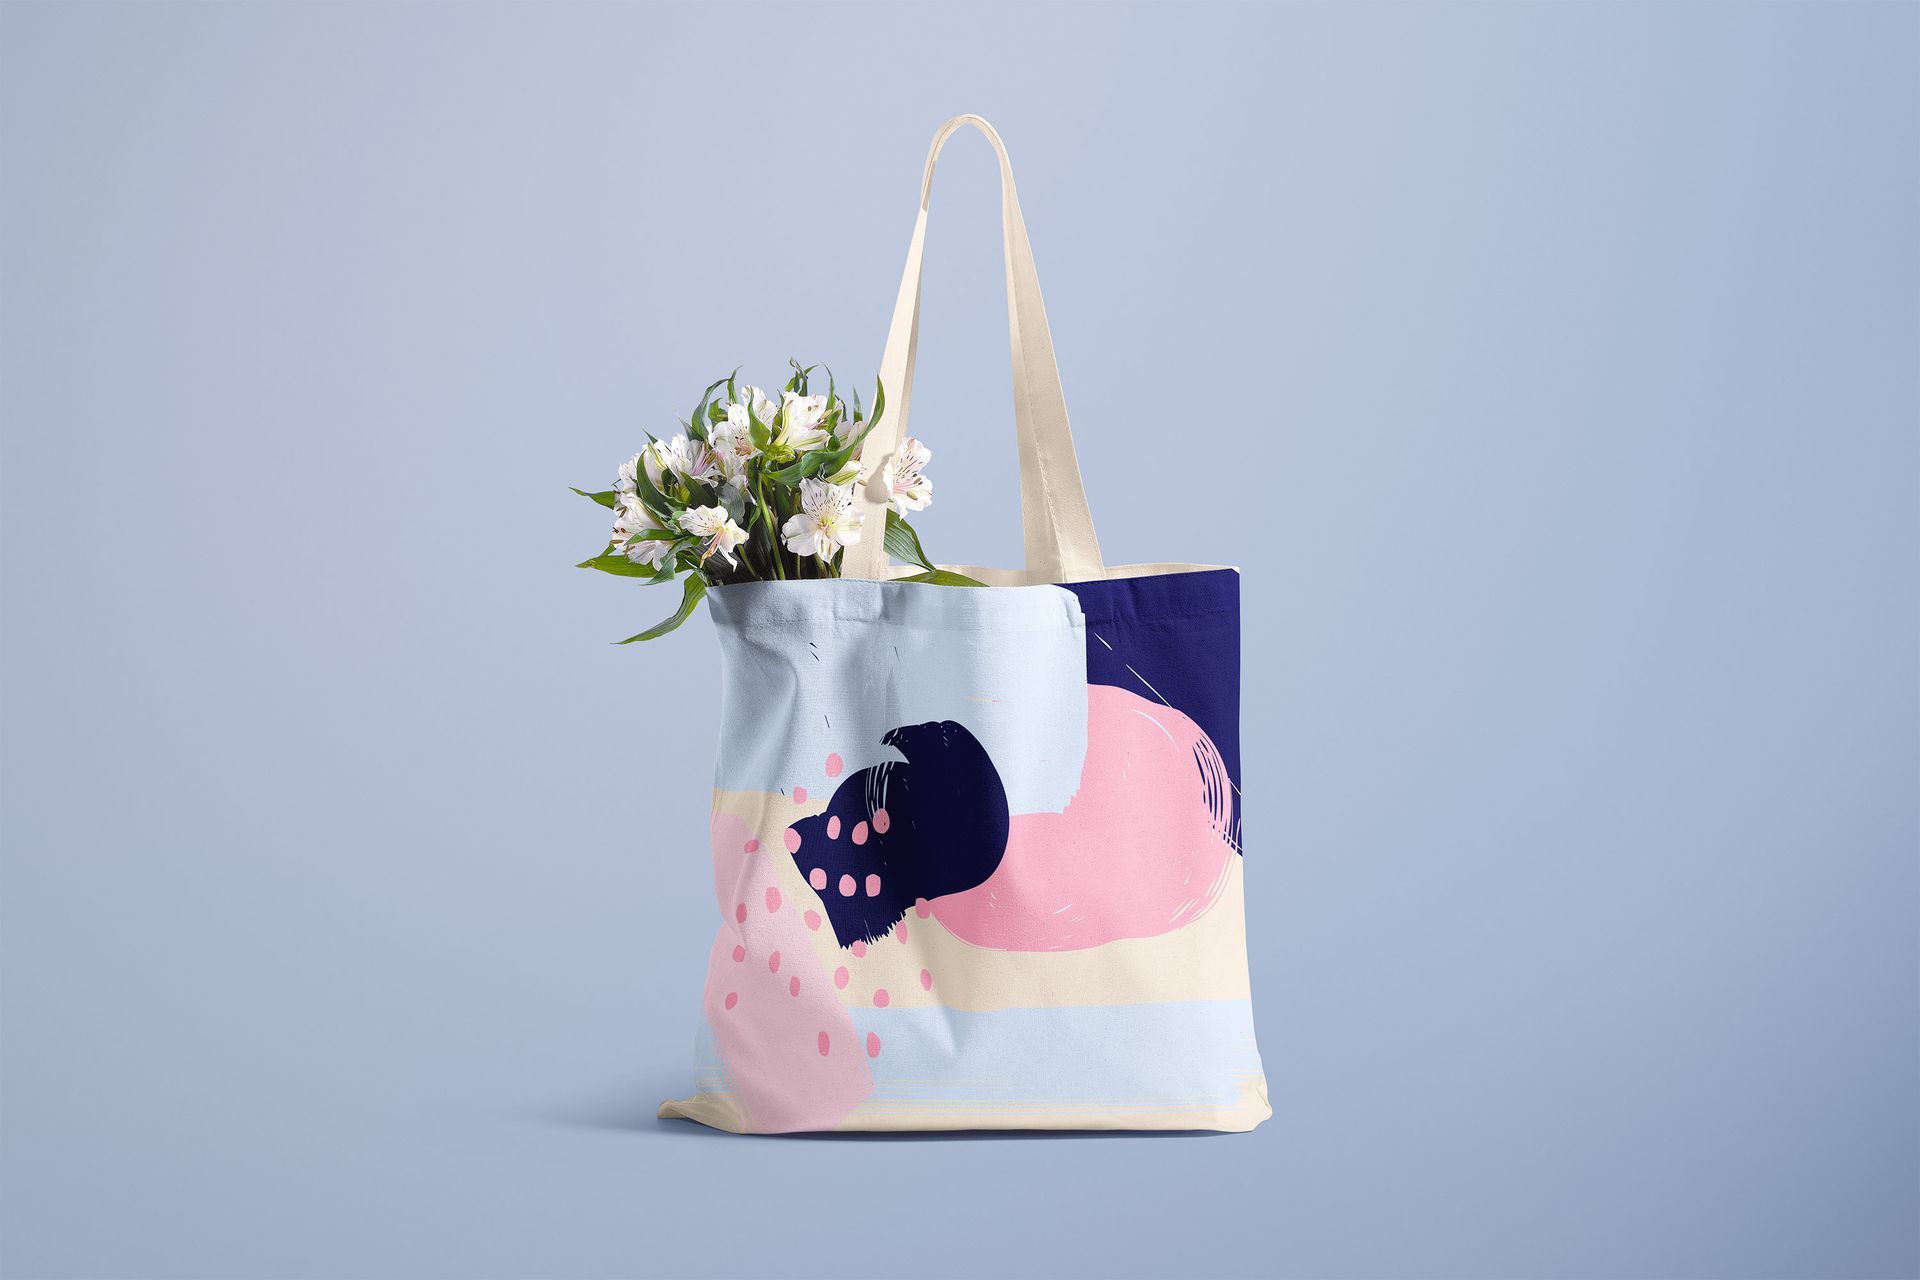
Return to the source PSD file and the modifications you made will be visible. The same tote bag mock-up will look like this:
Resources
This tutorial can be tried with some of the free Creatsy tote bag mockups! Give it a go!


